The Crossref Nominating Committee is inviting expressions of interest to join the Board of Directors of Crossref for the term starting in January 2025. The committee will gather responses from those interested and create the slate of candidates that our membership will vote on in an election in September.
Expressions of interest will be due Monday, May 27th, 2024
This is an exciting time to join the board, as we have a number of active projects underway: We are considering resourcing Crossref for a sustainable future and board members will be part of deciding any changes to our fees scheme and overseeing its implementation.
This past year has been a captivating journey of immersion within the Crossref community, a mix of online interactions and meaningful in-person experiences. From the engaging Sustainability Research and Innovation Conference in Port Elizabeth, South Africa, to the impactful webinars conducted globally, this has been more than just a professional endeavour; it has been a personal exploration of collaboration, insights, and a shared commitment to pushing the boundaries of scholarly communication.
One of the challenges that we face in Labs and Research at Crossref is that, as we prototype various tools, we need the community to be able to test them. Often, this involves asking for deposit to a different endpoint or changing the way that a platform works to incorporate a prototype.
The problem is that our community is hugely varied in its technical capacity and level of ability when it comes to modifying their platform.
When each line of code is written it is surrounded by a sea of context: who in the community this is for, what problem we’re trying to solve, what technical assumptions we’re making, what we already tried but didn’t work, how much coffee we’ve had today. All of these have an effect on the software we write.
By the time the next person looks at that code, some of that context will have evaporated.
Not sure if you’re using iThenticate v1 or iThenticate v2? More here.
Not sure whether you’re an account administrator? Check here.
Manage your admin account
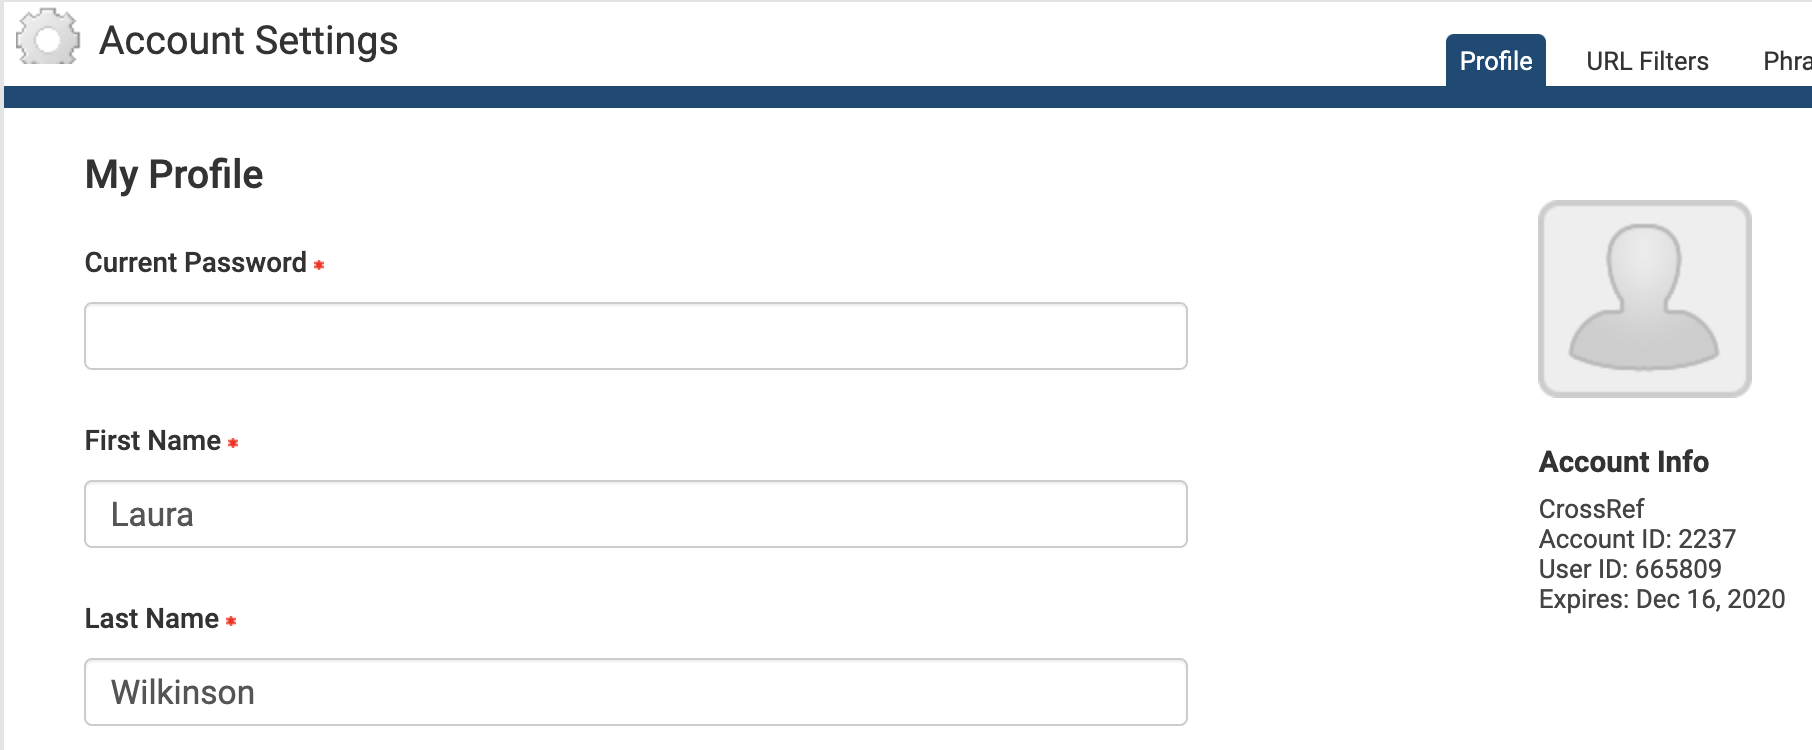
Manage your admin account using the Account Information tab. From here, you can make changes to your details in My Profile, set up URL filters and phrase exclusions across the whole account, and set up API access to connect your iThenticate account to your manuscript submission system.
Your admin account profile (v1)
The Account Information section shows important information about your iThenticate account, including your account name, account ID, and user ID. Please ignore the iThenticate account expiry date - we’re working with iThenticate to have this removed. The iThenticate account expiry date is set to 1 June 2022 by default.
From Account Info, then My Profile, you can:
Update your profile: this form shows your current details. To make changes, enter your password in the Current Password field at the top of the form.
Change the name attributed to your account: enter the first and last name in the relevant fields. These fields are required, you cannot leave them blank.
Change your email address: enter your email into the email field. This email address is used to send you important account information, so please make sure it is valid. This field is required, you cannot leave it blank.
Add a photo to your account: click Choose File, and select the image file you want to upload.
Change your password: enter your current password in the Current Password field, enter your new password in the Change Password field, and enter it again in the Confirm Password field.
Click Update Profile to save your changes.
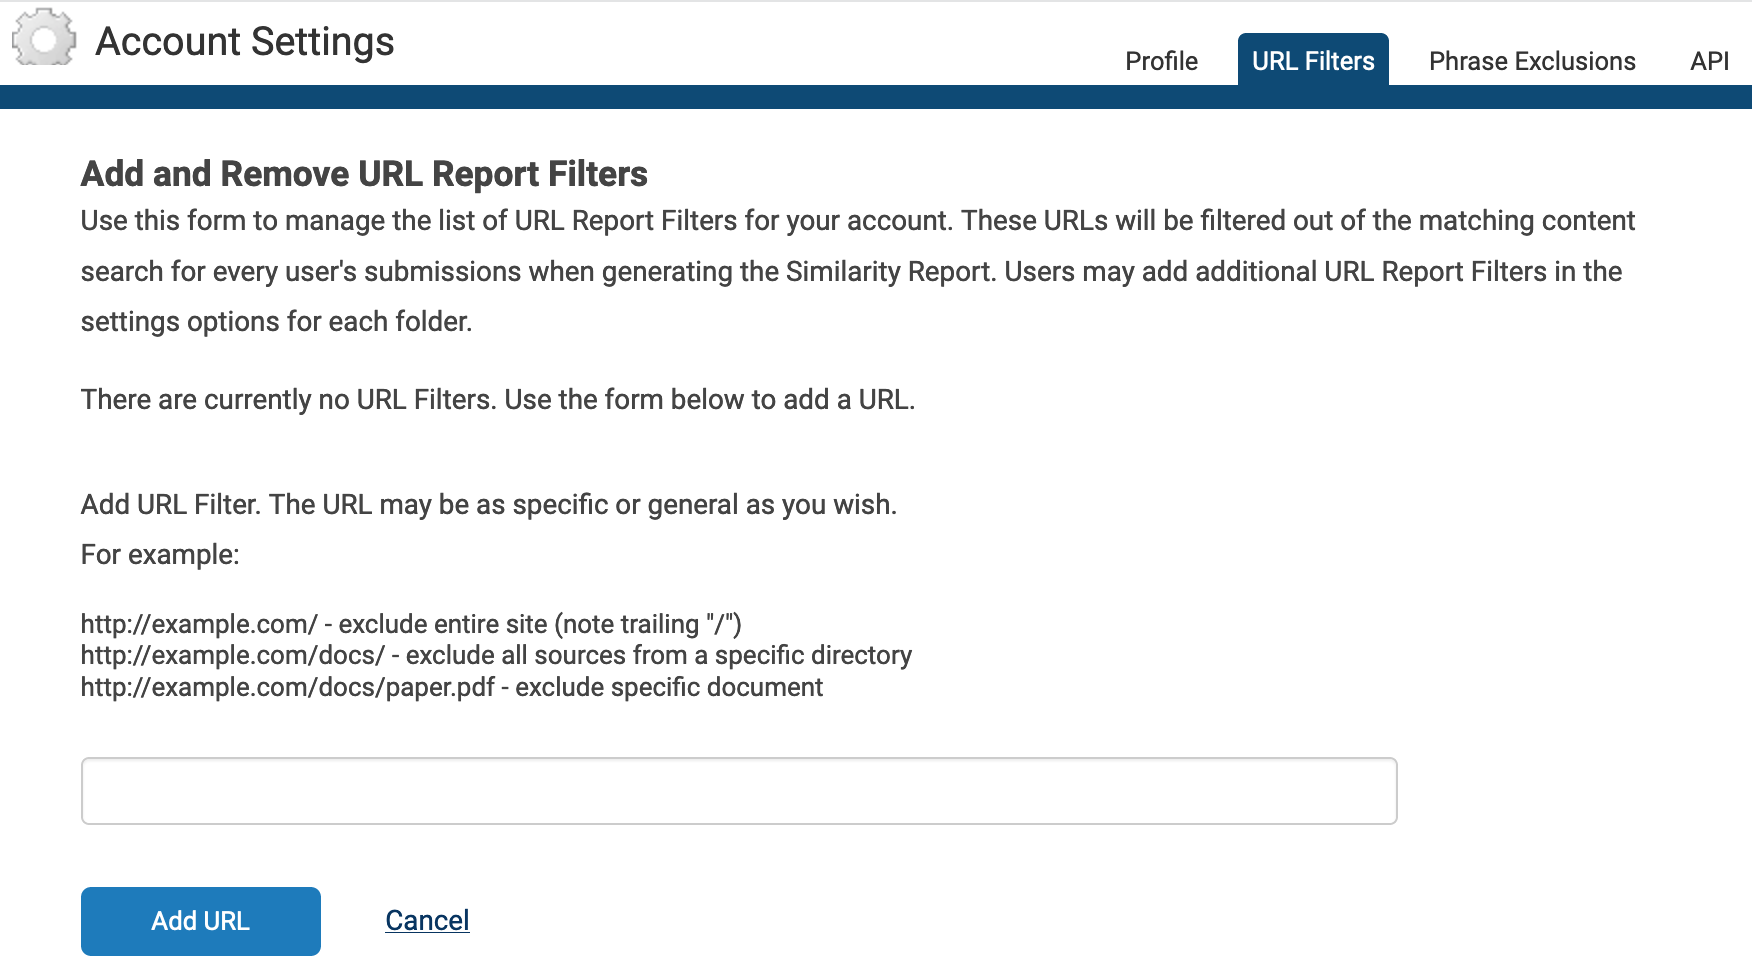
URL filters (v1)
This tab only appears if you are an account administrator.
Use URL filters to apply URL exclusion filters across your account. Any URLs that you add here will be ignored when the system checks your manuscript against the iThenticate database, and it will apply across your whole account. If you want to let individual users decide which URLs to exclude instead, they can do this themselves at folder level.
Add a URL to be filtered, and click Add URL. Don’t forget to include / at the end of your URL. Click the X icon to the right of the URL to remove it.
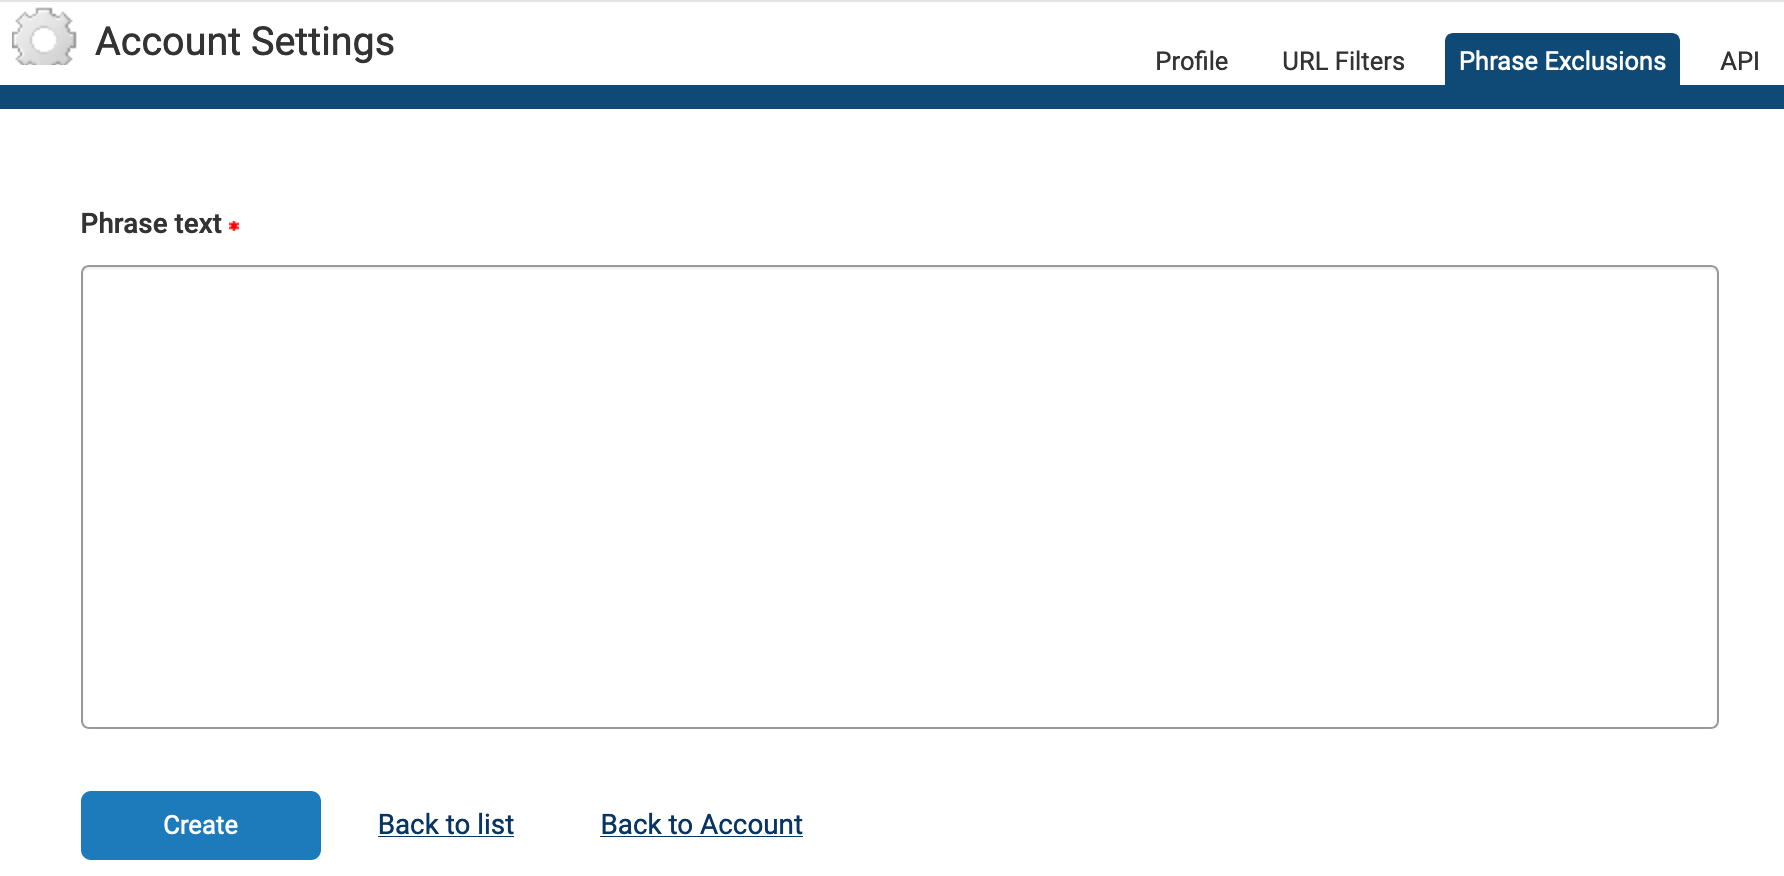
Phrase exclusions (v1)
This tab only appears if you are an account administrator.
Use Phrase Exclusions to apply phrase exclusion filters across your account. Any phrases that you add here will be ignored when the system checks your manuscript against the iThenticate database, and it will apply across your whole account. If you want to let individual users decide which phrases to exclude instead, they can do this themselves at folder level.
Click Add a new phrase, enter the phrase you would like to exclude in the Phrase text field, and click Create. You can add another phrase, go Back to List, or go Back to Account.
From the main Phrase Exclusions page, you can view, edit, or remove a phrase.
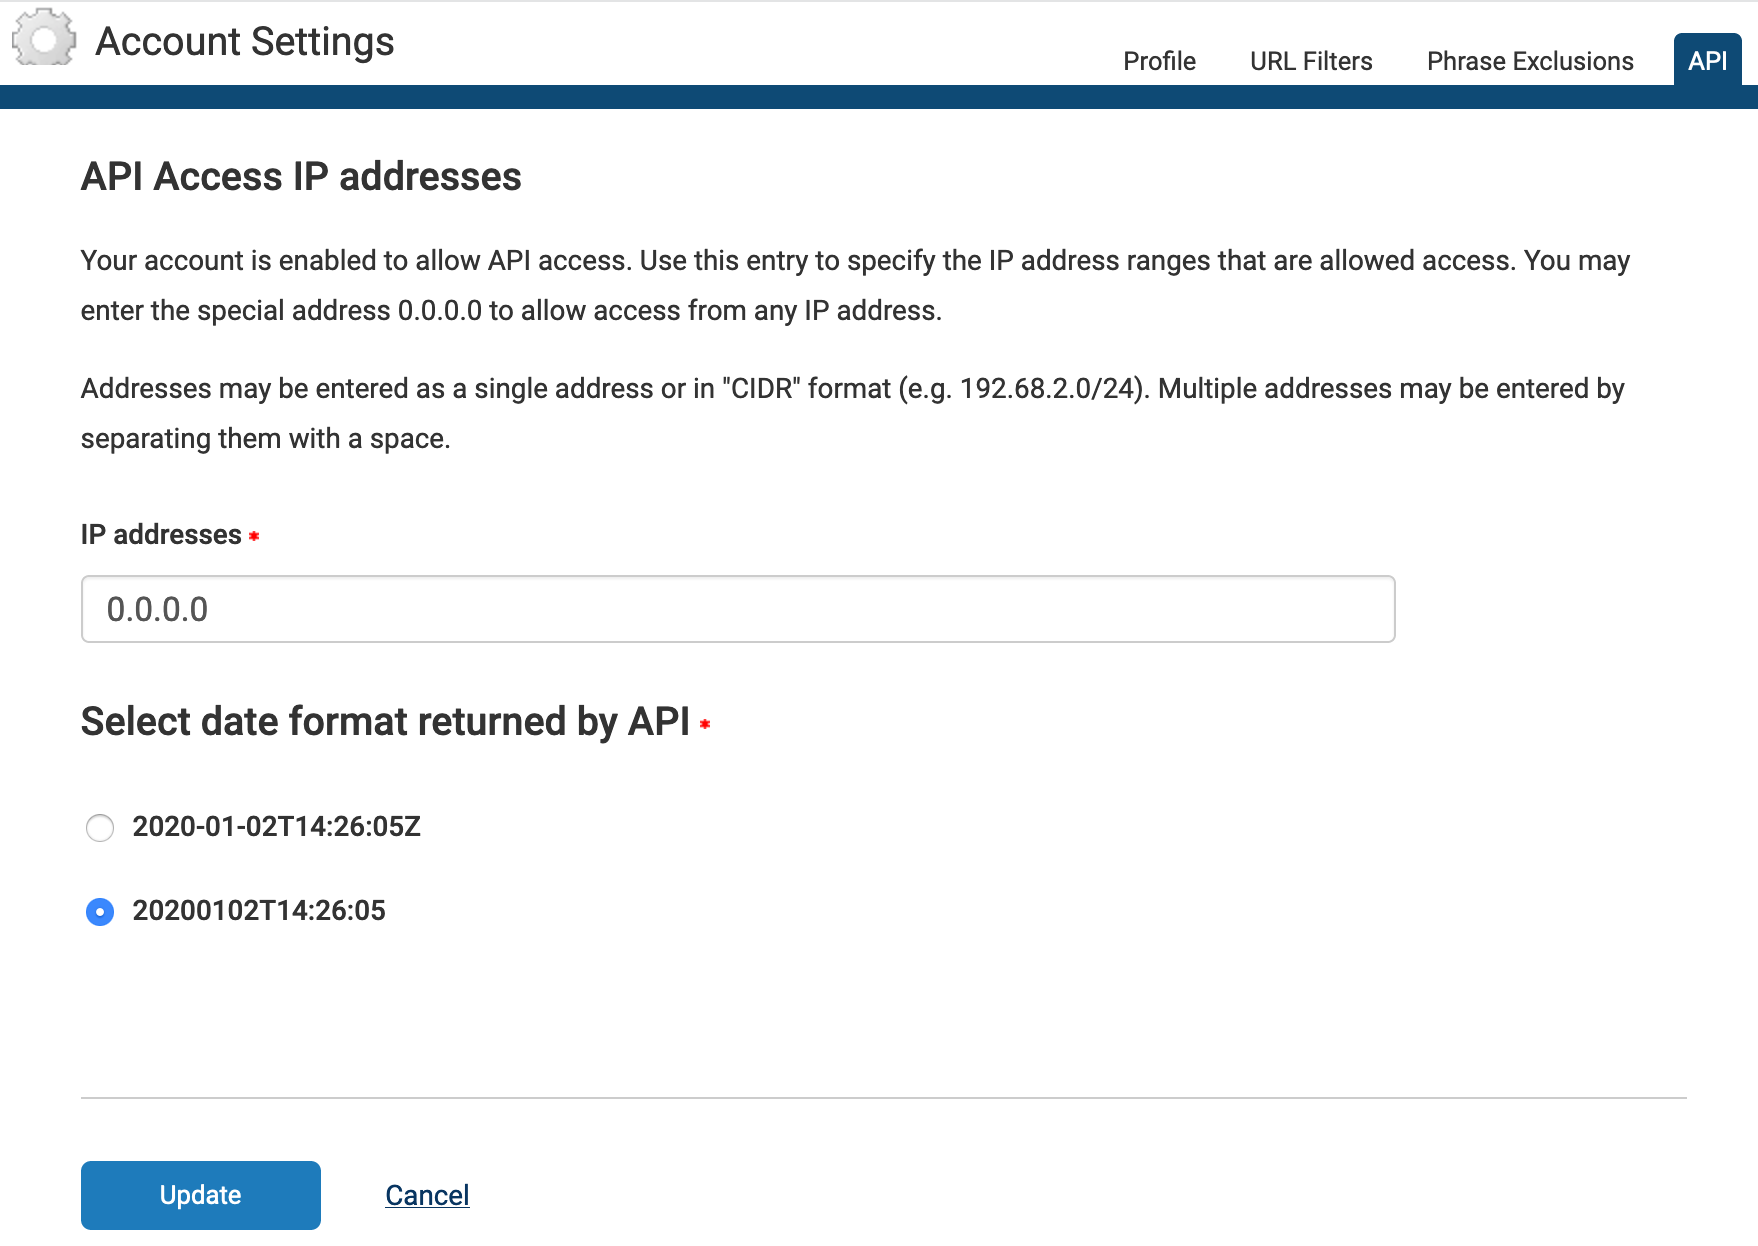
API access (v1)
This tab only appears if you are an account administrator.
If you want to connect your iThenticate account to your manuscript submission system, you can do this using the API. Once connected, you’ll be able to submit manuscripts for checking from within your manuscript submission system and see limited results. However, you’ll need to visit the iThenticate website to explore the results further.
You’ll need to contact iThenticate to set up access to the iThenticate API. Once your account has API access enabled, you’ll see the API Access IP addresses option under Account Info.
Use the IP addresses field to specify the IP address ranges that are allowed access to your account. Talk to your manuscript submission system contact for details of what to include here.
Use the special address 0.0.0.0 to allow access from any IP address. Enter addresses individually, or in Classless Inter-Domain Routing (CIDR) format, such as 192.68.2.0/24. Add multiple addresses by separating them with a space.